Back to index Back to index Home Home 2CV restoration -
Citroën's 2CV users manual -
Page 31
<< Page 30 Page 32 >>
MINOR REPAIRS: ADJUSTING THE HEADLAMPS - REPLACING A BULB(depending on equipment)

Adjusting the headlamps Fig. 44-44a
In order not to dazzle oncoming traffic, the dipped headlamps should have a range between 30 and 50 metres (33 and 55 yards).
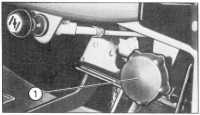
  • Adjustment from inside the car:
    To raise the beams: turn knob (1) clockwise.
    To lower the beams: turn the knob anti-clockwise.
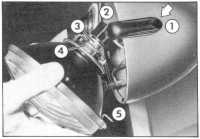
  • Adjustment from outside the car:
    The range and the direction of each headlamp beam can be modified by operating the hexagonal nut which secures the headlamp to its ball joint support.

As the adjustments can only be correctly carried out in workshop containing the necessary equipment, have them checked by a Citroën Dealer.
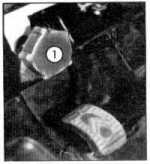
Page 31 Fig. 44

Fig. 44 - Adjusting the headlamps
from inside the car (L.H.D)
1 - Adjusting knob

Replacing a bulb (according to model) Fig. 45
Main/dipped beam bulbs 12V-45/40W.
  • Removing the headlamp unit
    - Press the rear part of the chrome-plated release catch(1), and tilt the unit towards the front to release the lower retaining lug.
  • Replacing the bulb
    - Disconnect connector (2) bearing the supply leads.
    - Tilt clips (4)by 90° while holding the bulb flange(3).
    - Remove defective bulb. The new bulb should be replaced by pivoting the flange until the positioning peg locks.
    - Do not forget to fold back clips (4) and to refit connector (2).

We recommend that you have your headlamp beam setting checked by a Citroën Dealer every time a bulb is changed.

Page 31 Fig. 44a

Fig. 44a - Adjusting the headlamps
from inside the car (R.H.D)
1 - Adjusting knob

Page 31 Fig. 45
Fig. 45 - Headlamps
1 - Release lock
2 - Connector
3 - Bulb flange
4 - Clips
5 - Retaining lug
2 CV 6 Spécial

Back to top Back to top Back to index Back to index << Page 30 Page 32 >>